We have a new machine in our lab! It is a laser cutter, which can be employed in both carving and cutting works. This laser engraver is equipped with one 40W water cooling laser tube, high precise stepping motors, high quality control board. It employs an USB port and thus can be connected to your laptop or desktop. By the support of included software, LaserDRW, this machine can work well with multiple graphic formats including lyz/bmp/jpg.

Note: The PDF version of tutorial is attached here.Tutorial for Laser cutter.pdf
**Worning: For safety, it is better to have a training before use it.**
How to use it?
- Necessary materials
There are several materials you need to prepare before you use the machine.
Software: Inkscape, Inkscape extension, LaserDRW
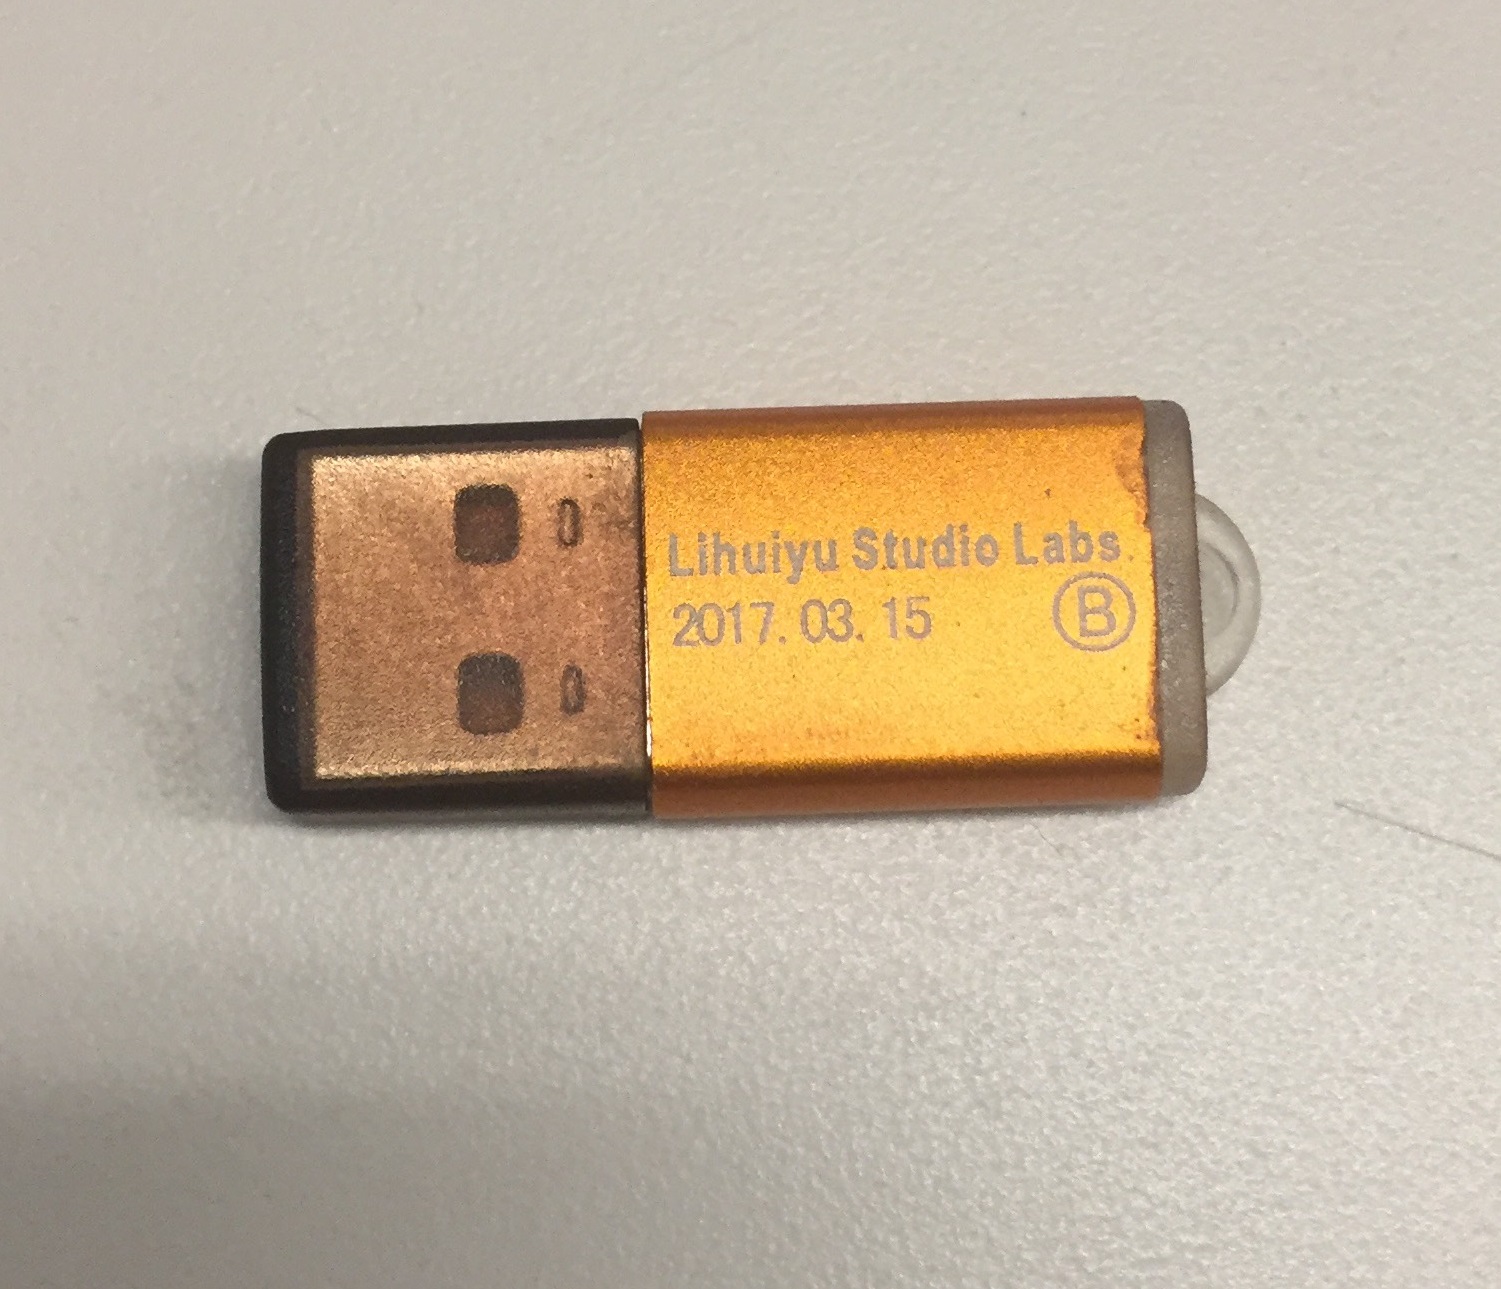
Hardware: USB key(shown as following picture), Plywood
 *Note: The software and its installation instruction will be attached(Window only).
- Pattern design
2.1 We use Inkscape to design the pattern, shown as following.
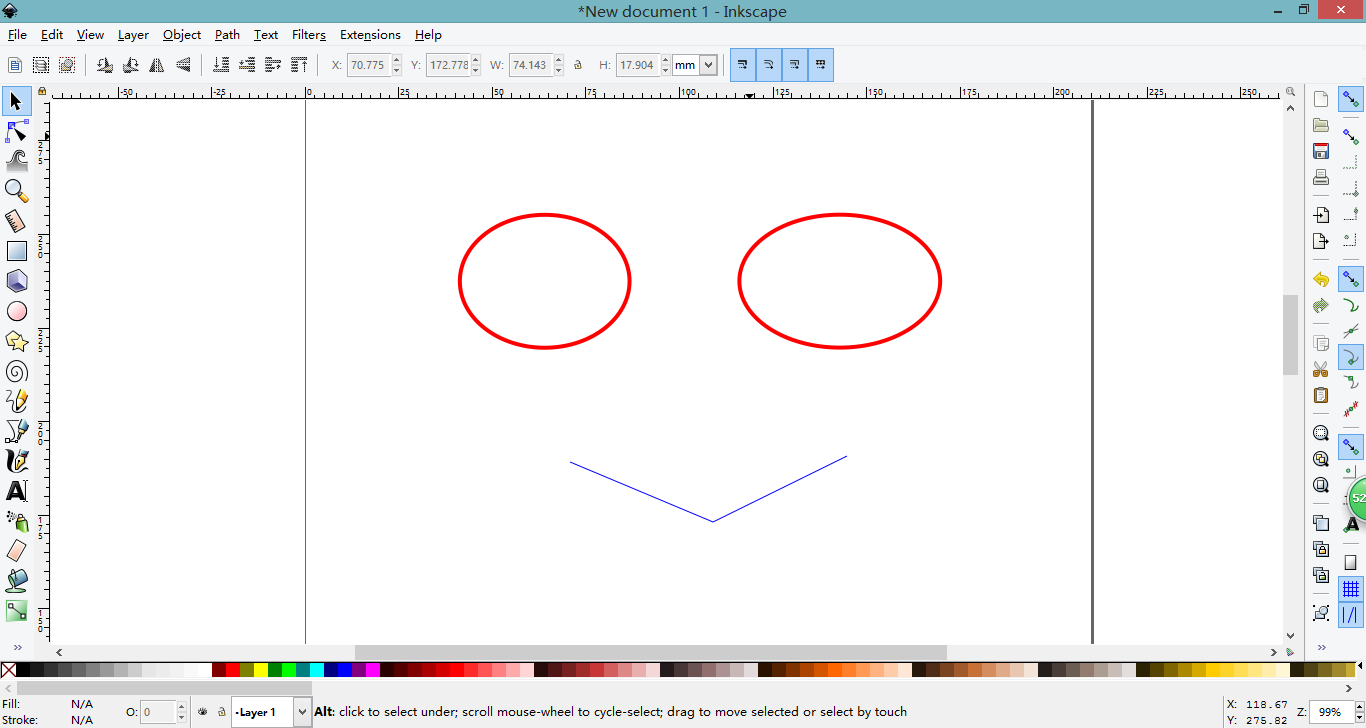 1) Use RED lines to indicate cutting;
2) Use BLUE lines to indicate vector engraving;
3) Use BLACK to indicate raster engraving (this can be shapes, paths or images)
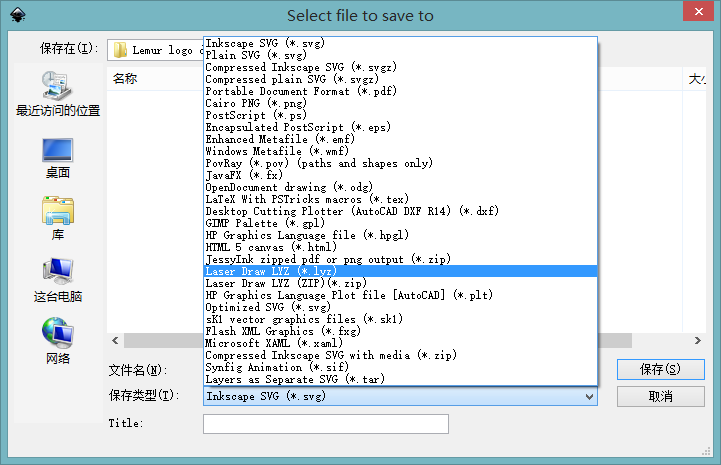
2.2 After you finish your design, save it as .lyz or .zip(Laser Draw LYZ) as the picture shows. I personally recommend to use .lyz file.
 Or you can use other software for design, and import the design into Inkscape. For example, I draw my pattern in Autodesk and save the design as .DXF file. Then I import the .DXF file into Inkscape.
- Cutting
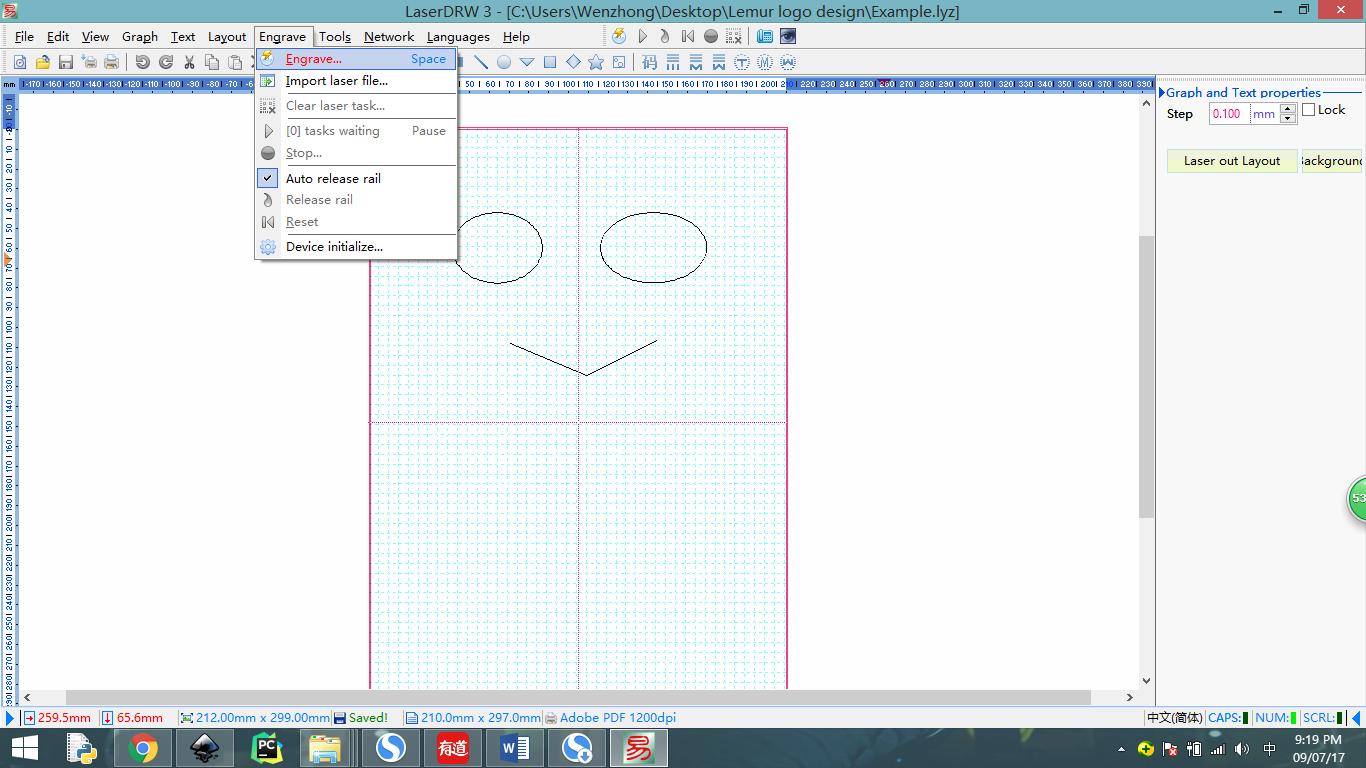
3.1 Double click your .lyz file, and you will see the picture like following.
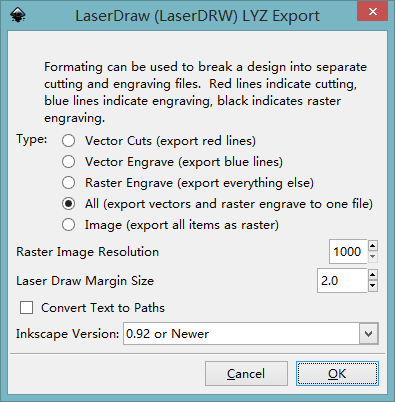
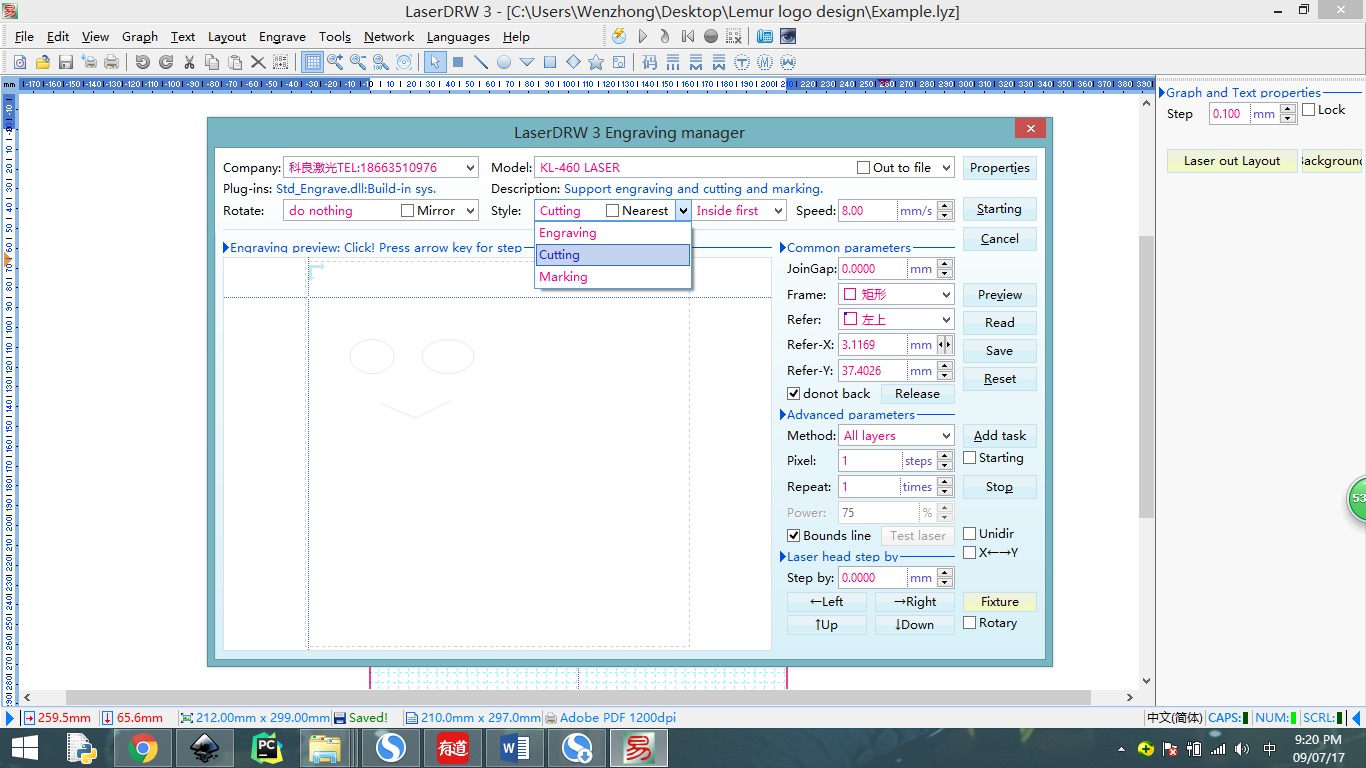
 3.2 Find the ‘Engrave’ and click it, then a small window will pop up as below. You can change the style according to your design. The recommended speed for our polywood is around 8mm/s.
 3.3 Before hit ‘starting’, you need to activate our machine.
 1) Open air vent and cooling air (coming soon);
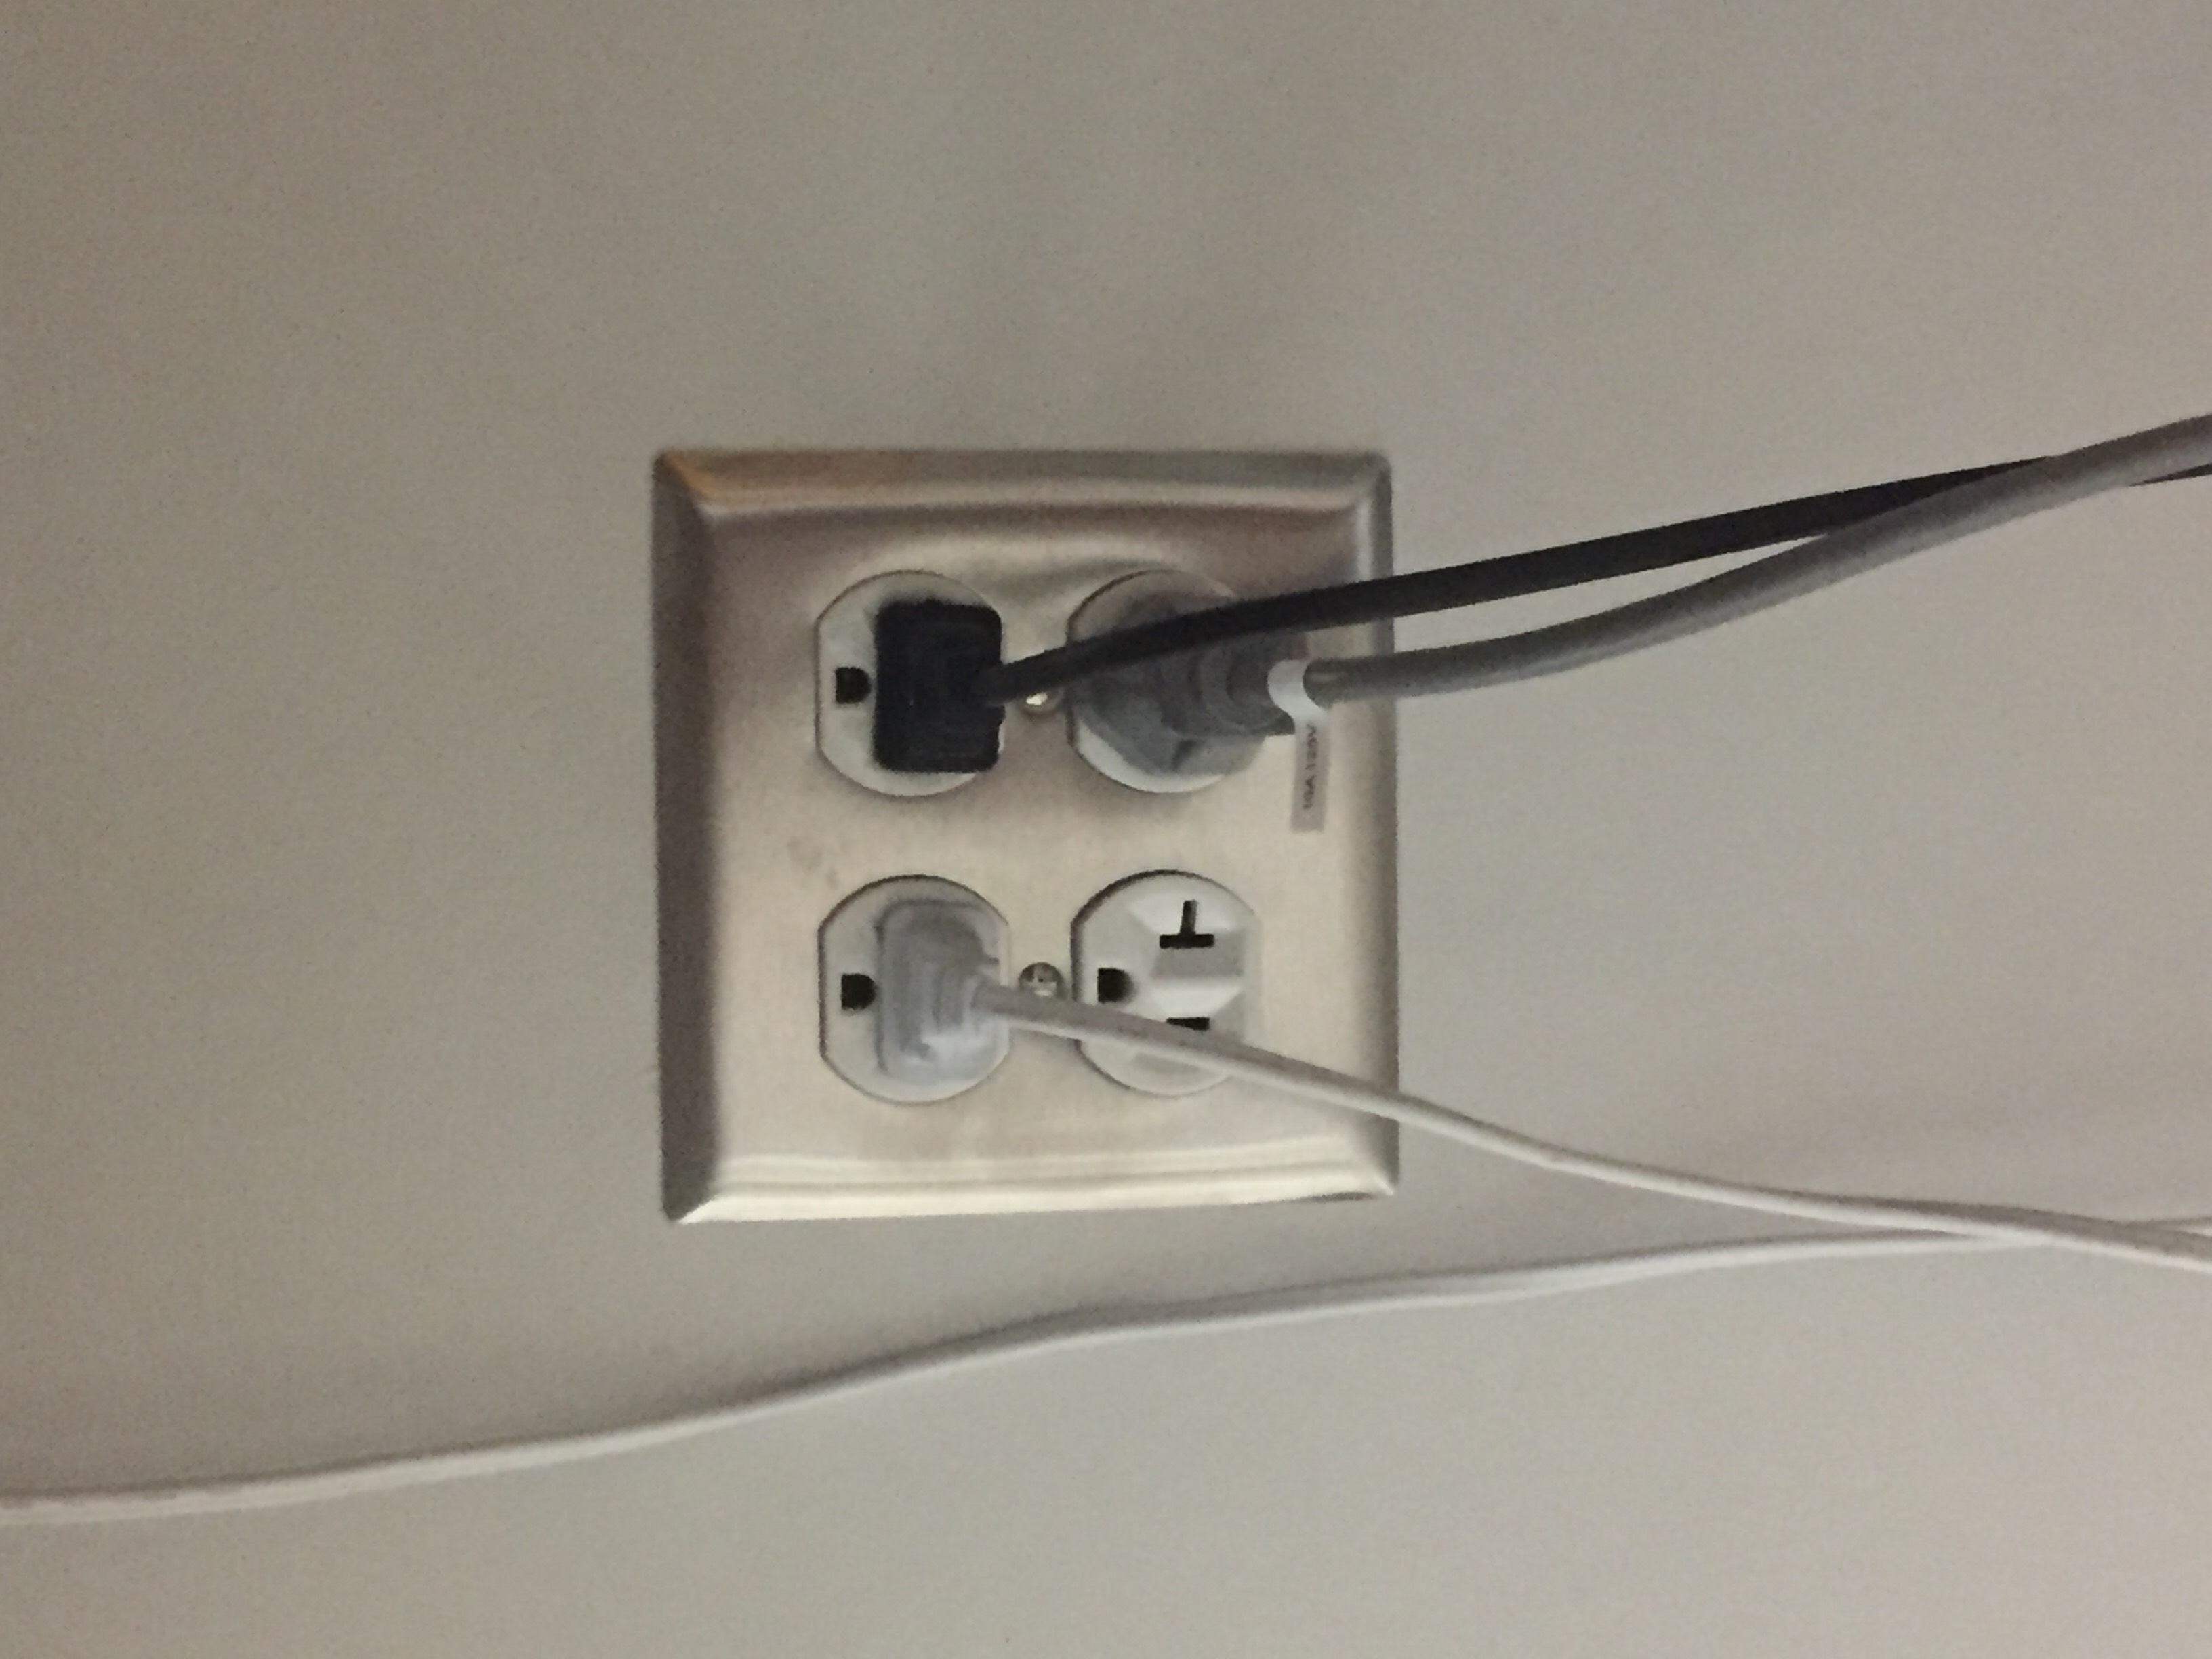
 2) Plug in Laser cutter, water pump and exhaust fan (the socket is under the table);
 3) Connect your laptop to laser machine by blue USB cable;
4) Plug USB key into laptop;
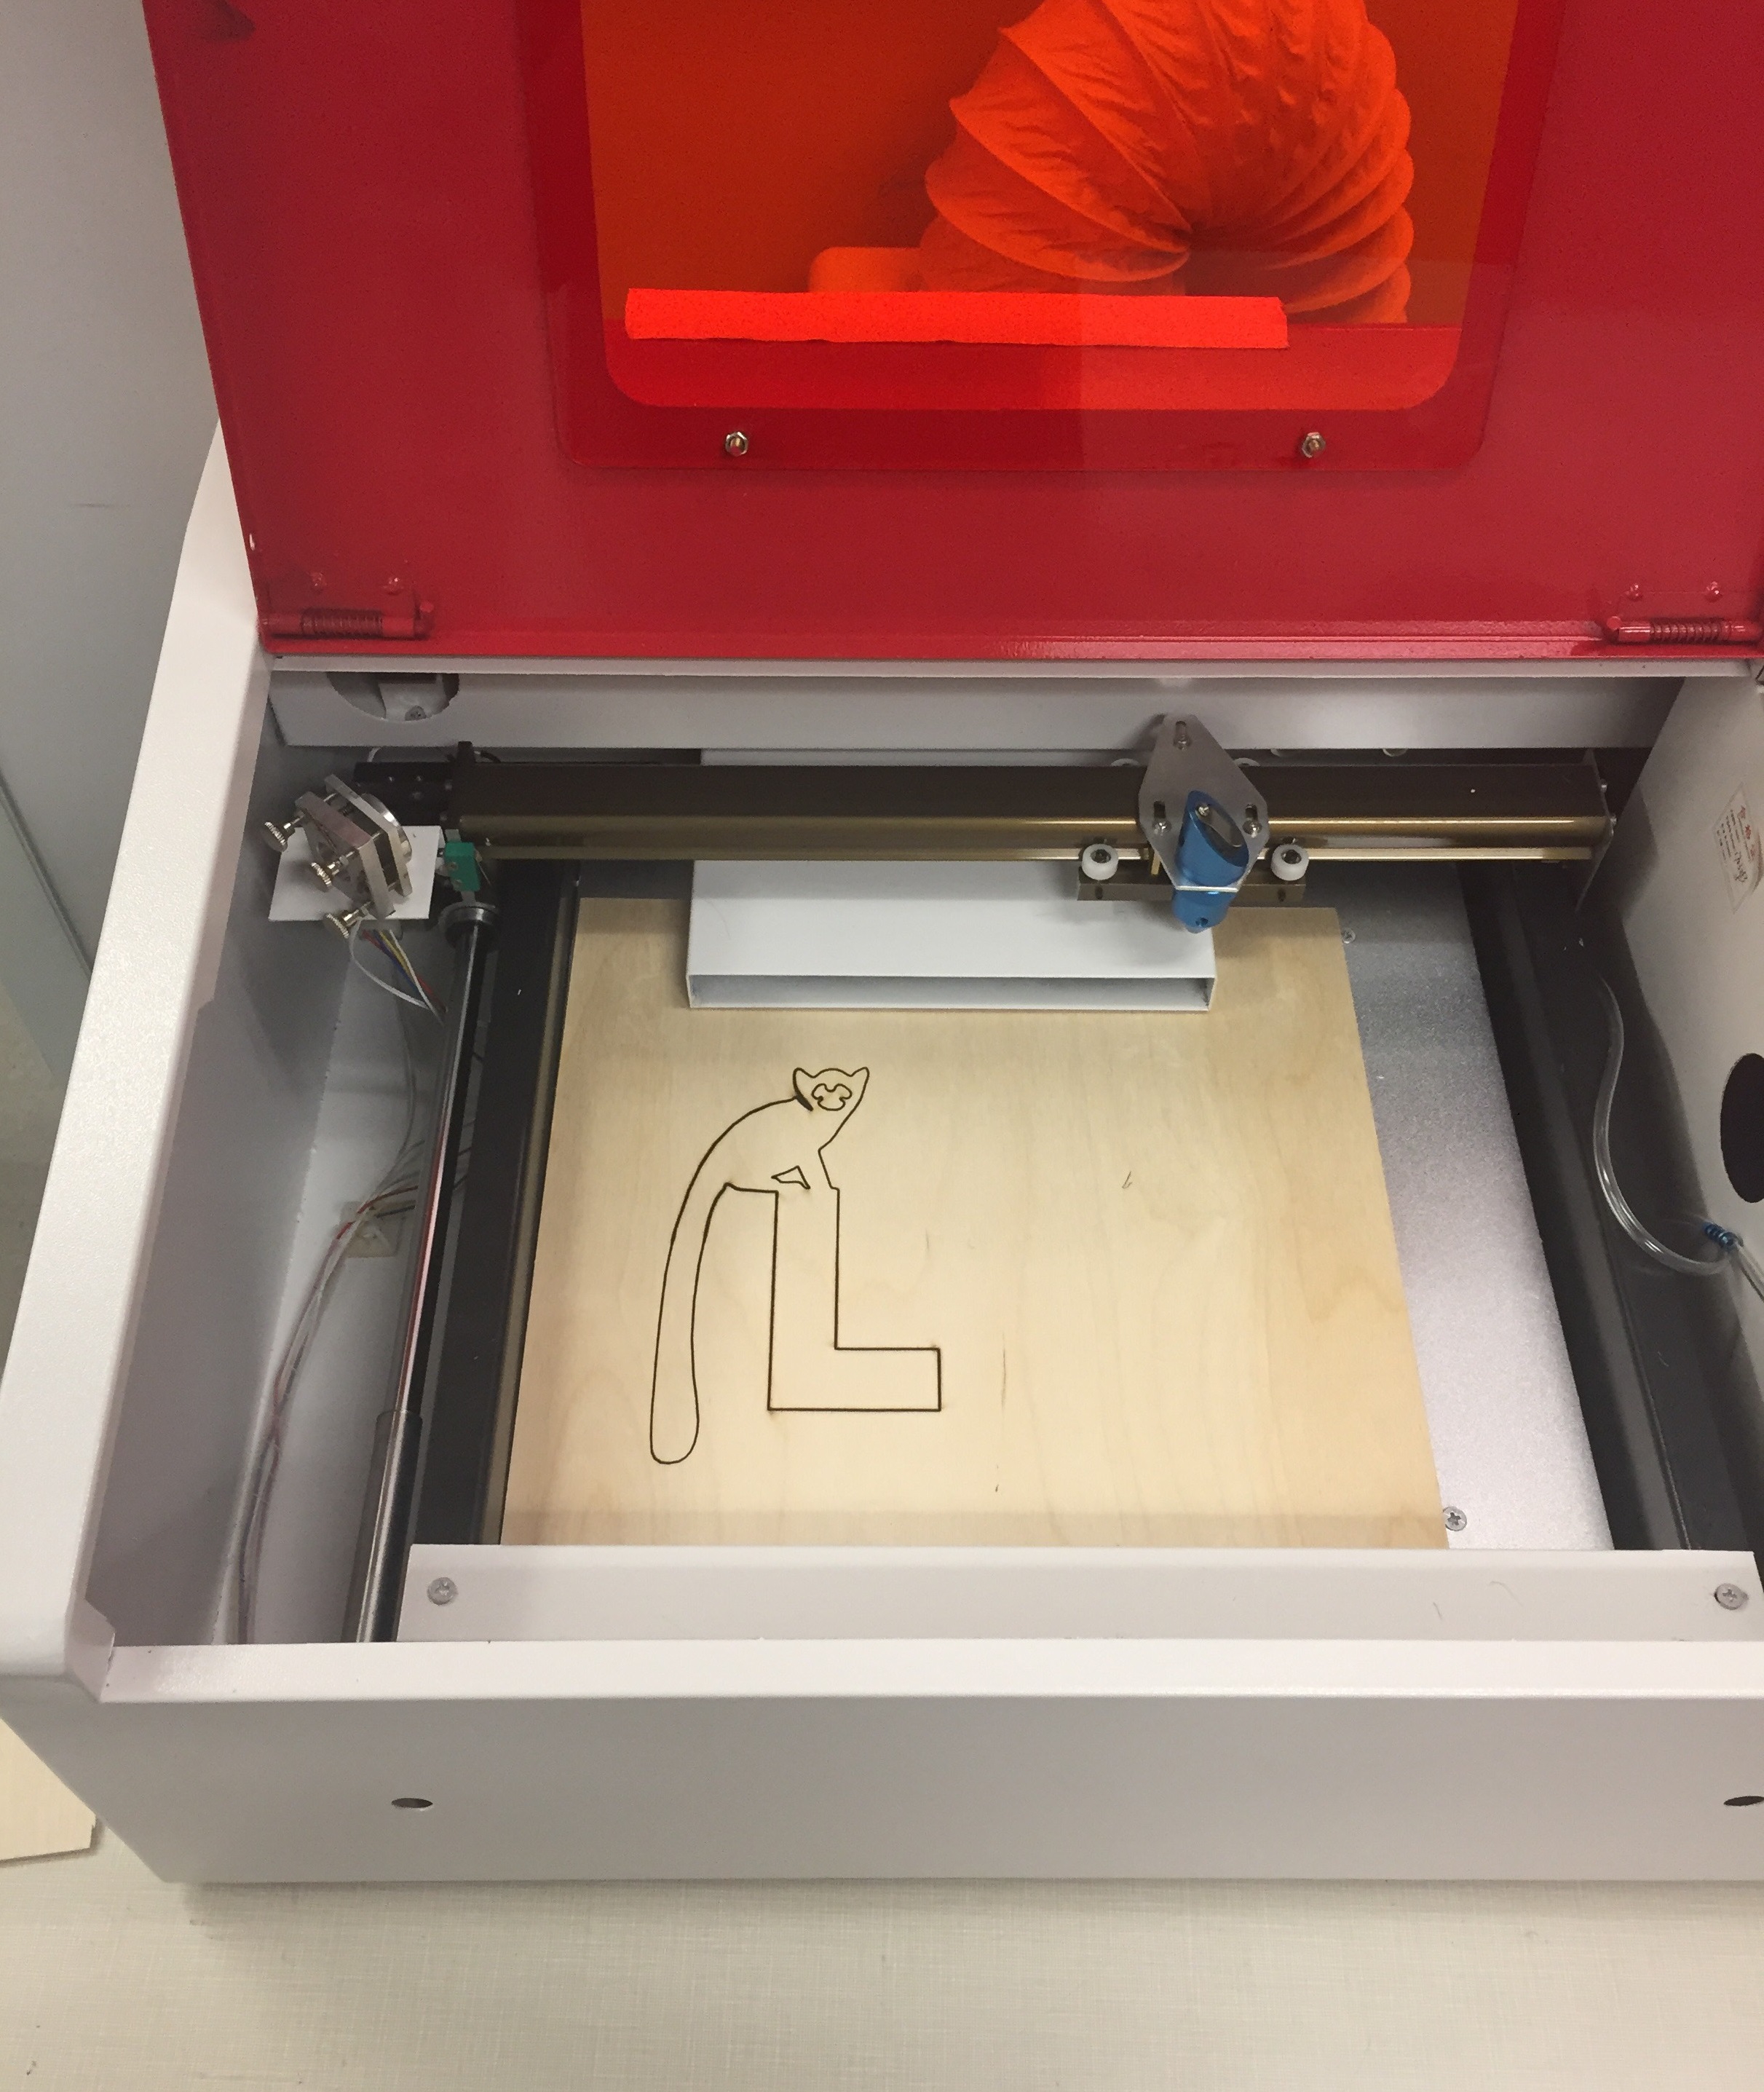
5) Load your material (like polywood) and close orange Protective Cover;
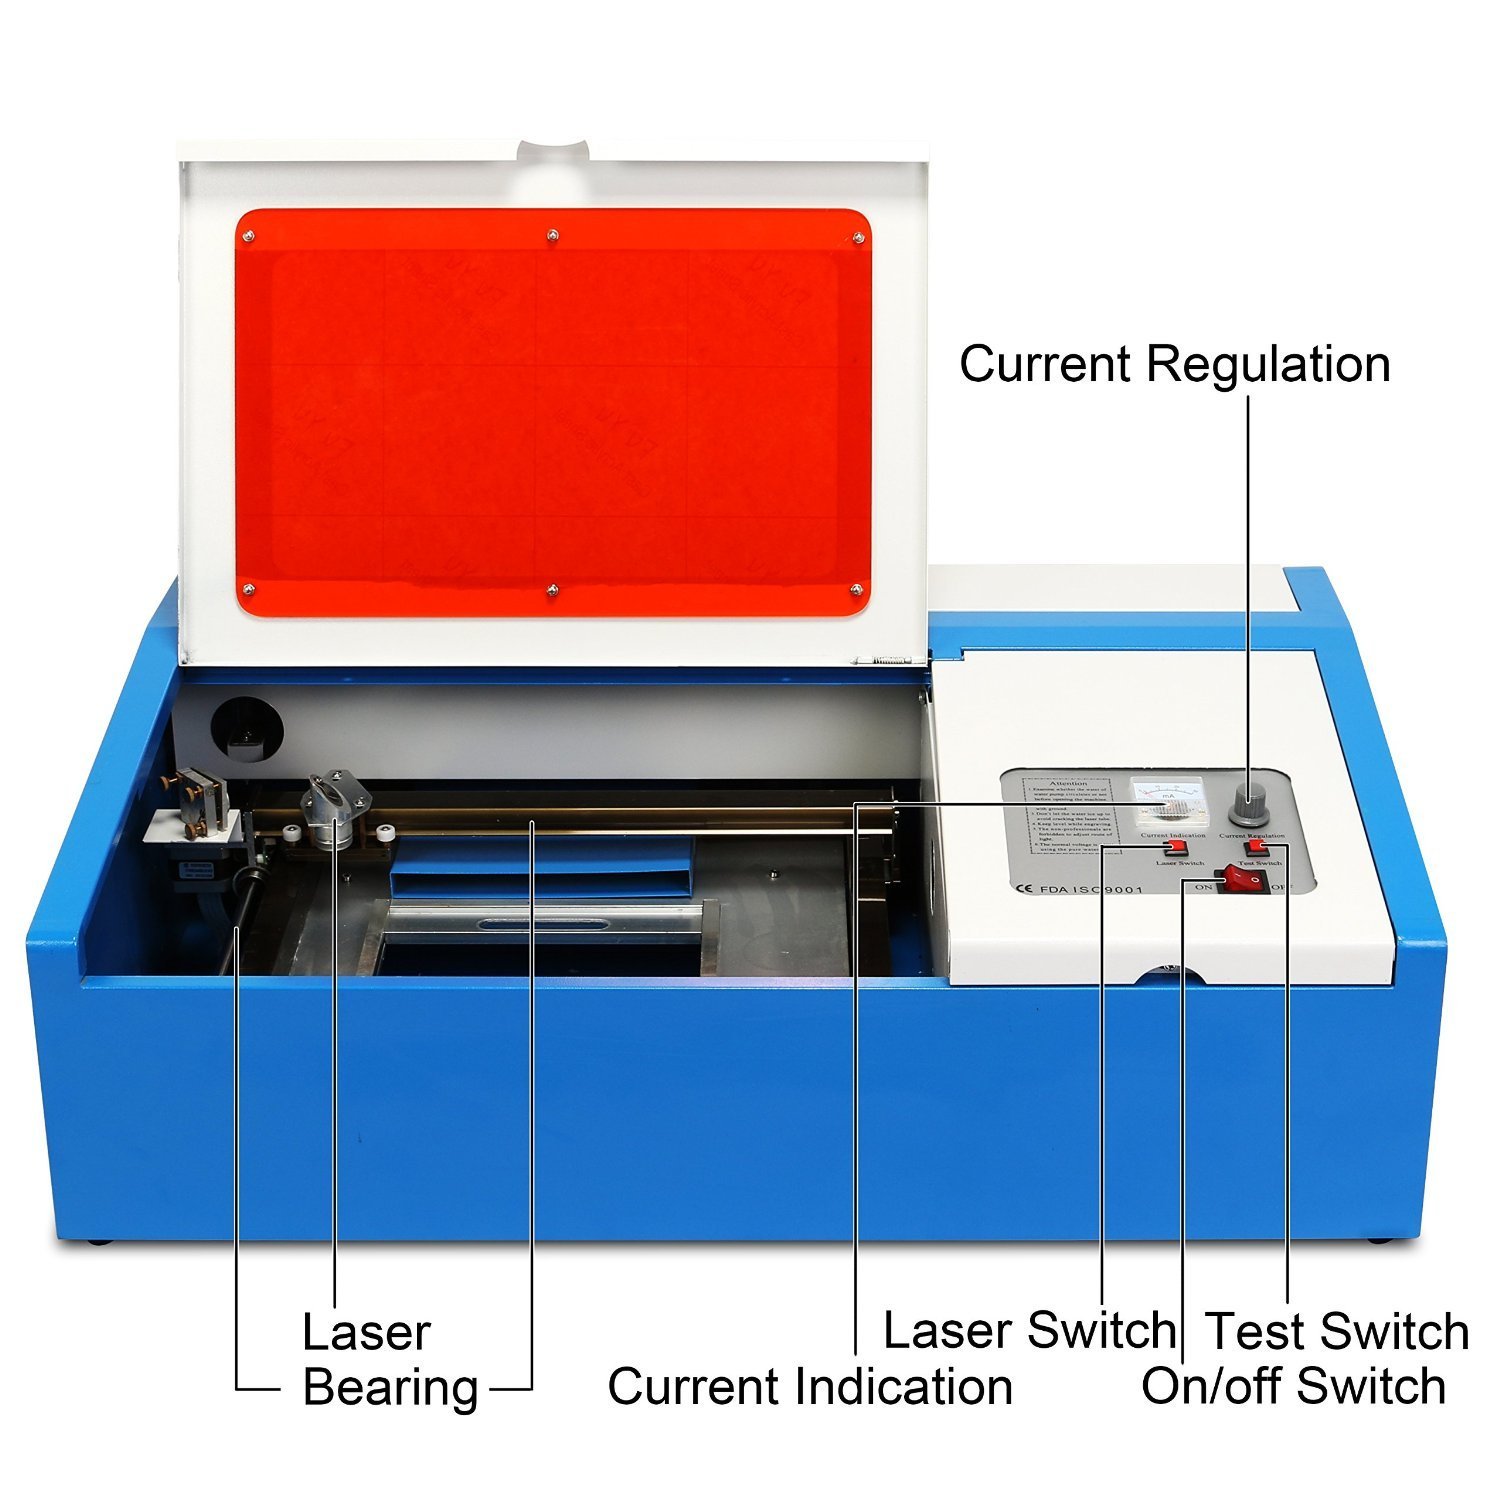
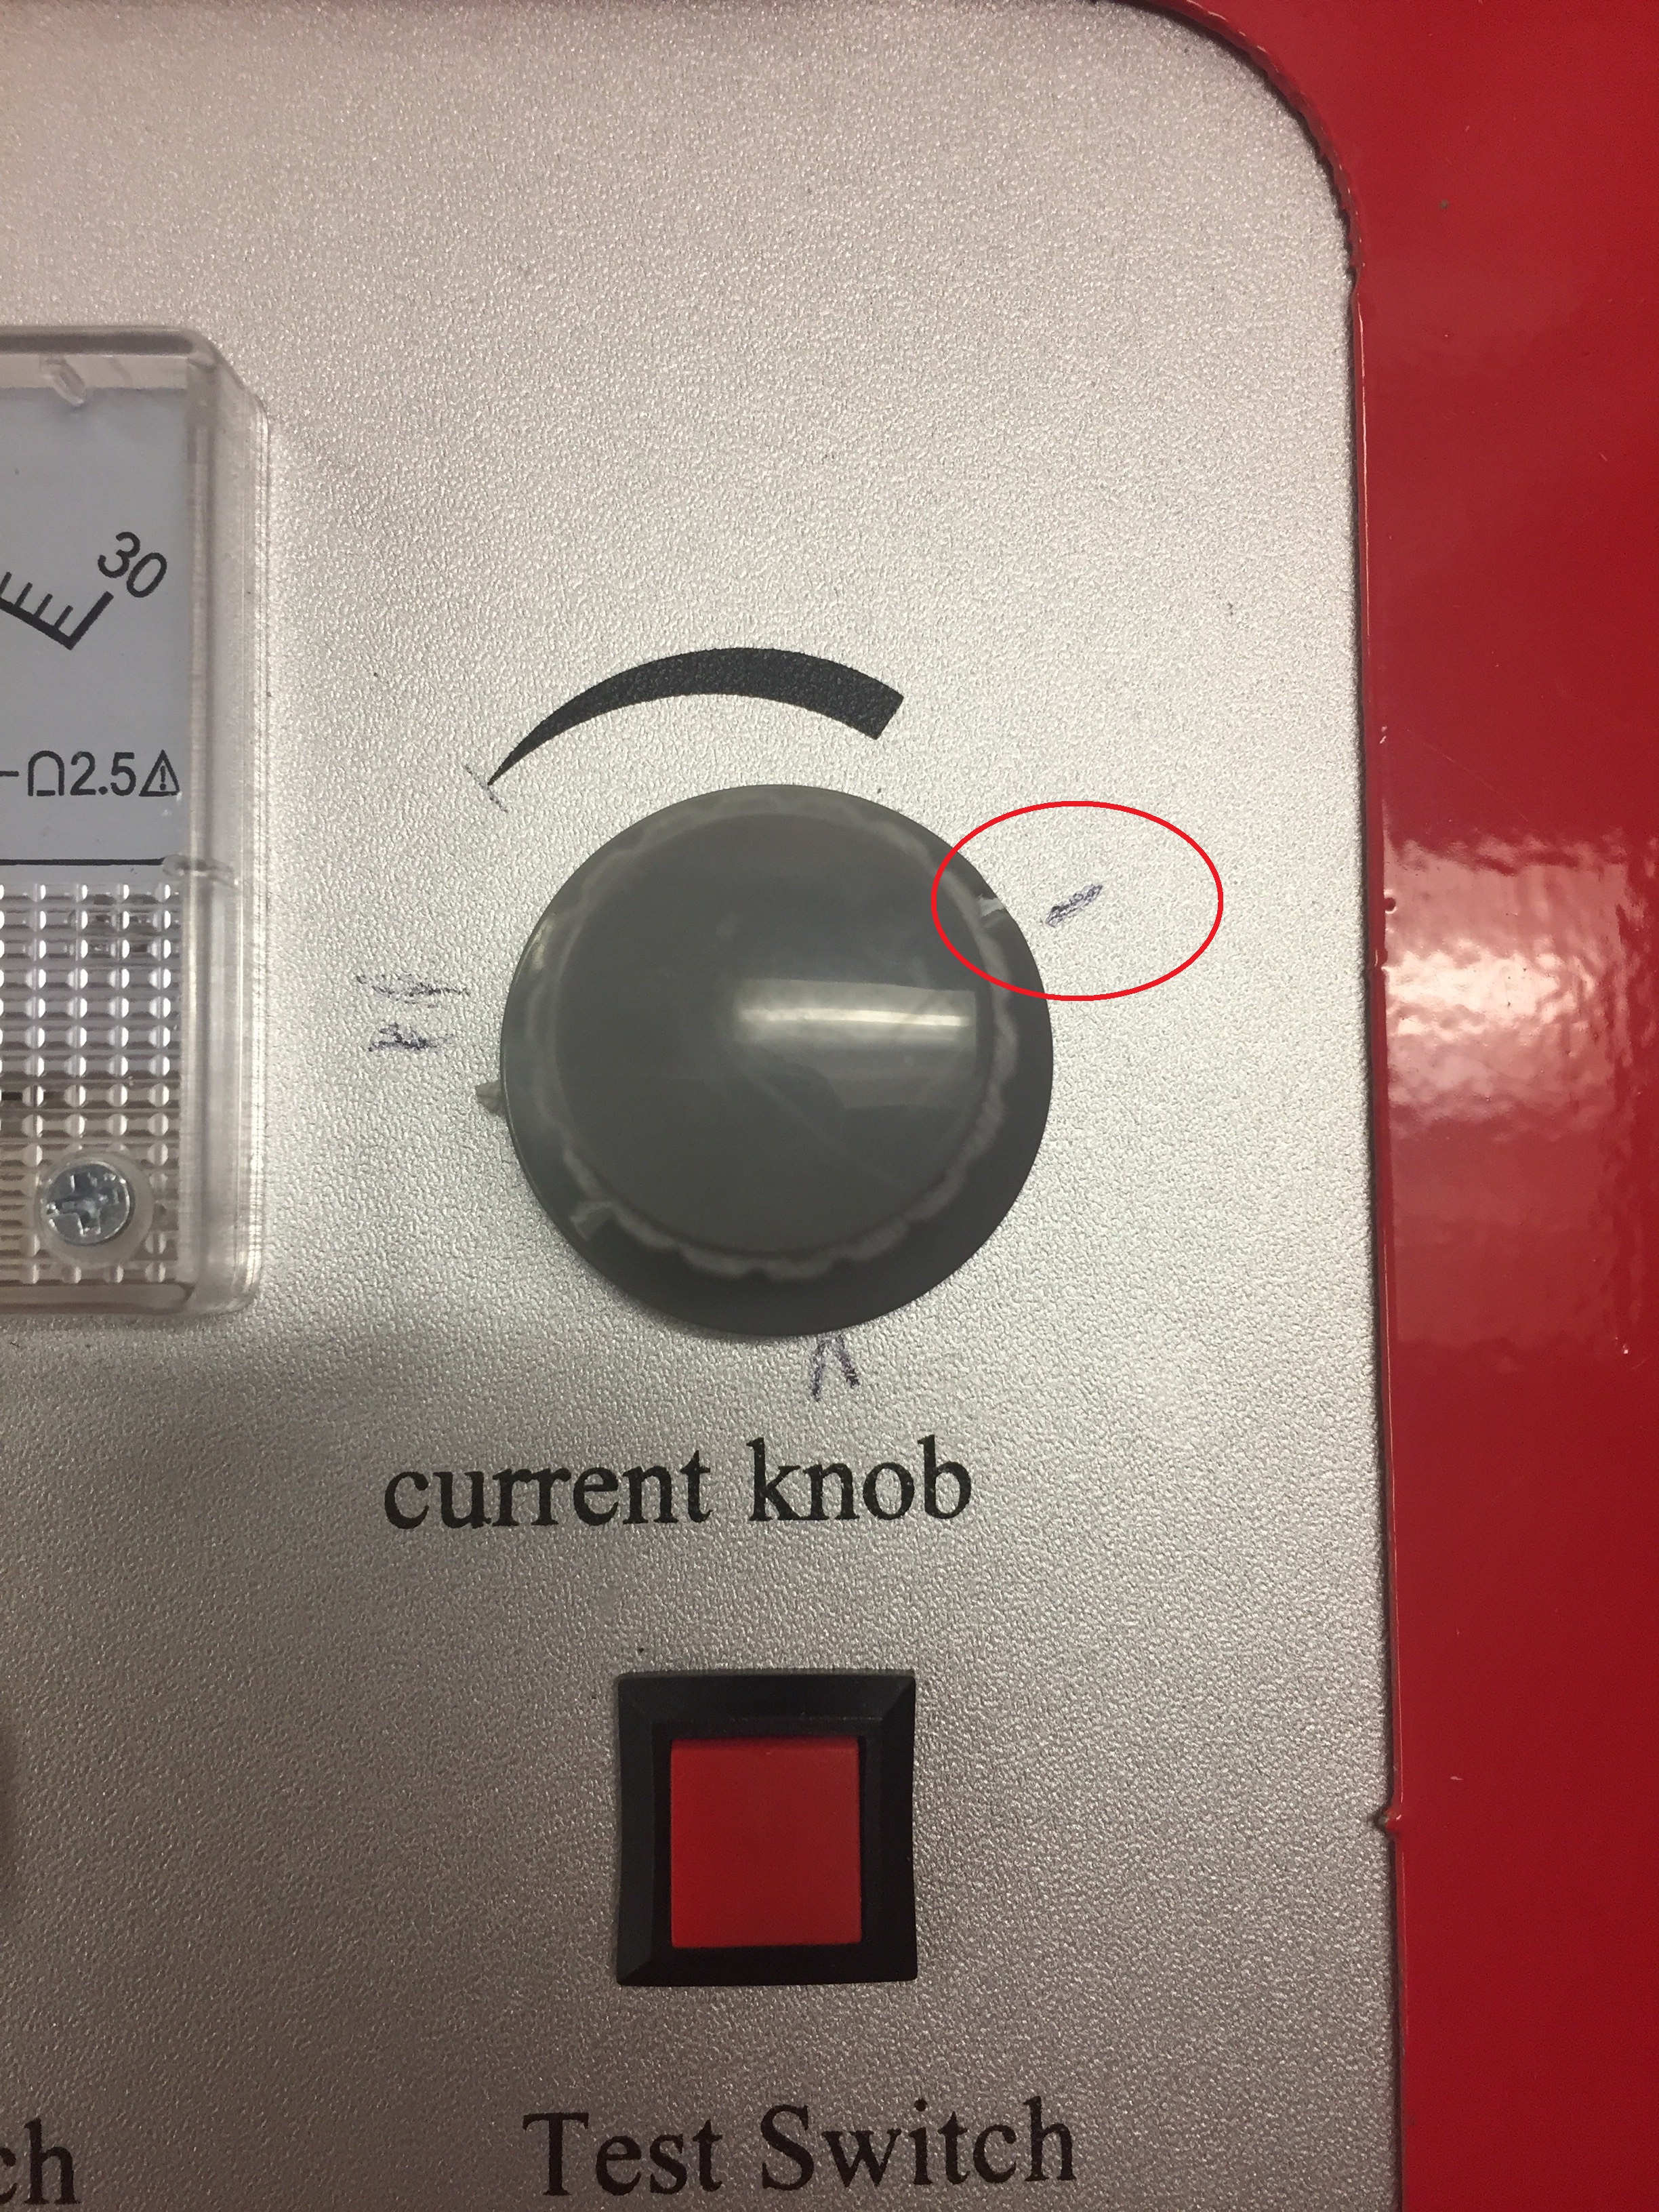
 6) Adjust the ‘Current Regulation’ to match your material (for example, plywood, the current is marked as below);
 7) Close the ‘On/off Switch’;
8) Close the ‘Laser Switch’;
9) Hold the ‘Test Switch’ for one second to check if the laser cutter works. If the answer is no, go back to check it. If yes, go to next step;
10) Click ‘Starting’ in LaserDrw, then you will have your masterpiece in minutes;
11) Before your open the protective cover, make sure you turn off the machine.